The Importance of Copyediting and Proofreading
February 27, 2024

Introduction to Azure WebJobs
Introduction
Here at Marathon Consulting, we are coming to the end of a long process to move our internal and client applications, web sites, services, and databases to the cloud into Microsoft Azure. As you can imagine, some of the applications have moved easily while others have presented a challenge. One of the mobile applications we developed, ODU InGame Stats, relied on a Web API, a SQL Server database, and a Windows service that were hosted on internal servers. Moving the Web API to an Azure web app and the SQL Server database to an Azure SQL database were relatively painless. However, the Windows service presented a problem because there is no equivalent to running a Windows service on Azure outside of standing up a Windows Server VM which is cost prohibitive and overkill for running a single service.
Comparison of Azure Cloud Services
Doing some research lead me to many different options for automating processes in Azure including Microsoft Flow, Logic Apps, Functions, and WebJobs. Each of them has different advantages and disadvantages and Microsoft has a great article to help you figure out which one is right for the task you are trying to automate. I ended up choosing WebJobs to replace the Windows service mainly because it can be deployed to an existing App Service with no additional cost and I was already moving the Web API to a web app. It also seemed to make the most sense because I needed the job to run every minute and Functions is a compute service with pricing based on when it is running so the costs could build quickly.
Configuring the Project
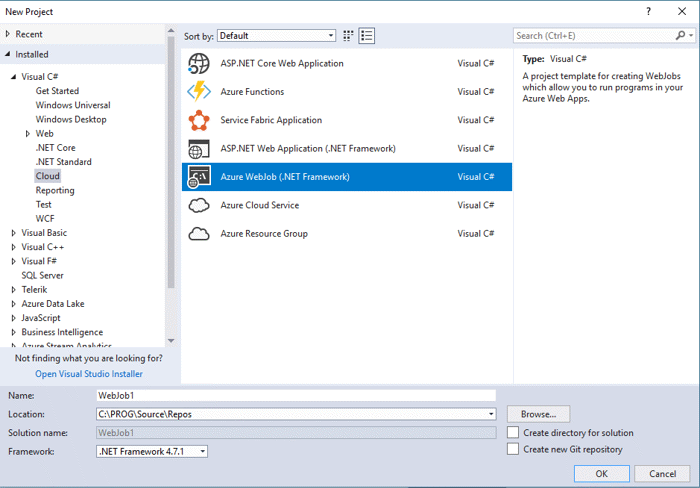
Visual Studio 2017 provides support for creating WebJobs as long as you have the latest Azure SDK installed. In Visual Studio, go to File, New Project and select the Cloud option under Visual C# and you’ll see the Azure options available.
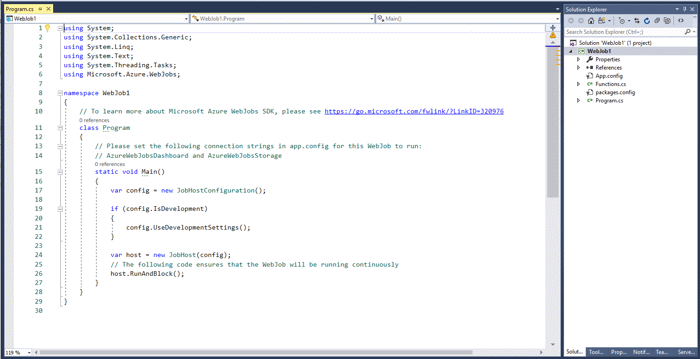
Once you create the project, you’ll get scaffolding for a WebJob as shown below.
Take a look at the NuGet packages by right-clicking on the project and selecting Manage NuGet Packages…, and you’ll see that Microsoft.Azure.WebJobs and Microsoft.Azure.WebJobs.Core have been added for you automatically.
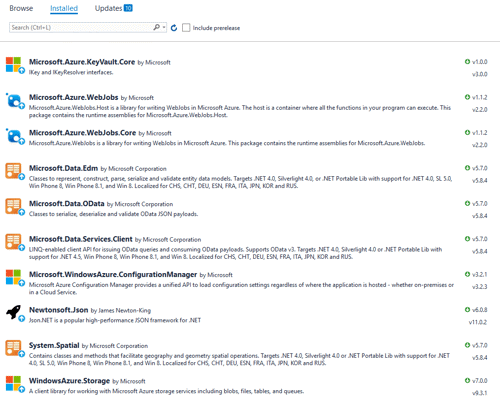
One NuGet package, I’d recommend installing is the Azure WebJobs Extensions (Microsoft.Azure.WebJobs.Extensions), which contains some great functionality including the TimerTrigger, which I’m using for this WebJob.
Once you have the NuGet packages installed, there are 2 connection strings you’ll need to enter in order for the WebJob to function correctly. There is a comment about this above Main in Program.cs in case you forget. In your App.config file you’ll see entries for AzureWebJobsDashboard and AzureWebJobsStorage. Fill those out as described in the comment above the entries.

Coding the Solution
You may notice the structure and code that was scaffolded for the WebJob project looks very similar to a console application and that’s because it is a console application with Program.cs having Main as the entry point into the application. We won’t be doing much here but we’ll need to turn on the use of the Timer extension and we’ll also set a couple environmental variables.
class Program
    {
        // Please set the following connection strings in app.config for this WebJob to run:
        // AzureWebJobsDashboard and AzureWebJobsStorage
        static void Main()
        {
            var config = new JobHostConfiguration();

            // enable use of Timer extension
            config.UseTimers();

            if (config.IsDevelopment)
            {
                config.UseDevelopmentSettings();
            }

            // tell azure where your azure connection strings are
            Environment.SetEnvironmentVariable("AzureWebJobsDashboard", ConfigurationManager.ConnectionStrings["WebJobsDashboard"].ConnectionString);
            Environment.SetEnvironmentVariable("AzureWebJobsStorage", ConfigurationManager.ConnectionStrings["WebJobsStorage"].ConnectionString);

            var host = new JobHost(config);

            // The following code ensures that the WebJob will be running continuously
            host.RunAndBlock();
        }
    }
The next file we want to take a look at is Functions.cs where you’ll be coding the logic for the WebJob. By default, there is not much here.
public class Functions
    {
        // This function will get triggered/executed when a new message is written
        // on an Azure Queue called queue.
        public static void ProcessQueueMessage([QueueTrigger("queue")] string message, TextWriter log)
        {
            log.WriteLine(message);
        }
    }
Notice that it is setup with a QueueTrigger. Keep in mind you’re not calling anything in functions from your code. Your code is triggered via one of the trigger types in Azure WebJob Extensions.
Let’s step back for a bit and I’ll explain what I want this WebJob to do so it will make more sense when we are walking through the code. The Windows service that was part of the back-end services for the InGame Stats app had a simple task which was to check a FTP site during the time an ODU sports game was in progress. During a game, an XML file was being constantly updated on the FTP site with live statistics. The windows service would download the XML file and save the results to the SQL Server database. When a user of the mobile app has selected the game in progress, the app will call the Web API to get the current stats and the Web API queries the database and parses the stats XML into JSON which is used by the app to populate the stats page.
The basic function I needed the WebJob to do to replace the Windows service was to log in to the FTP site every minute, grab the stats XML file if it has changed, and save that XML to the Azure SQL database. For this to work correctly, a QueueTrigger would not work so the first thing I need to do is replace that with a TimerTrigger. I also changed the name of the method to reflect what it was doing since ProcessQueueMessage made no sense for this.
// run every 60 seconds
public static void DownloadStatsFile([TimerTrigger("0 * * * * *", RunOnStartup = true)] TimerInfo timerInfo, TextWriter log)
{
     log.WriteLine("Stats Downloader has started.");
}
The syntax for the timer trigger is setup to run every 60 seconds via a Cron expression. The rest of the code used to download and save the XML is beyond the scope of this article but what we have done is enough to publish and run the WebJob.
Publish to Azure
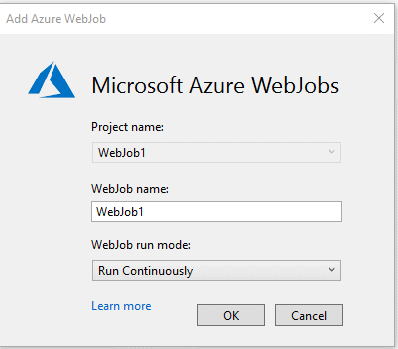
Publishing the WebJob to Azure could not be easier. Just right-click on the project and select Publish as Azure WebJob. You’ll be prompted to name the WebJob and choose the run mode. For this task, I needed the WebJob to run continuously so that the timer trigger can function correctly.
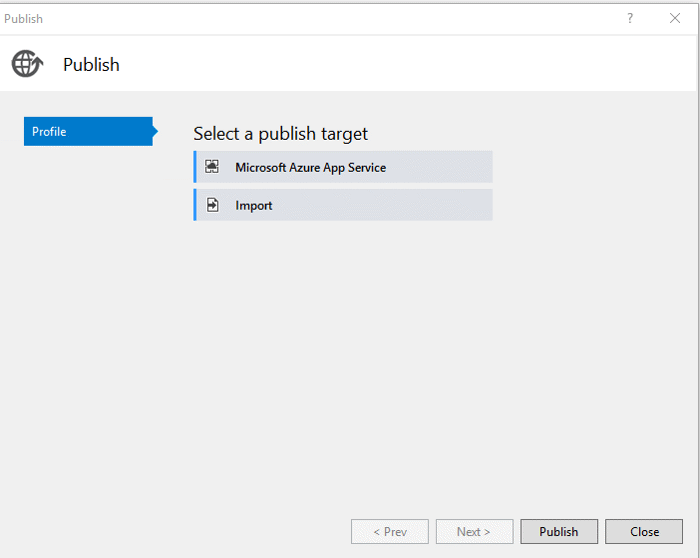
Next, you’ll be prompted to select a publish target. Click on the Microsoft Azure App Service to select your Azure Subscription and select an existing app service or create a new one.
Monitoring the WebJob
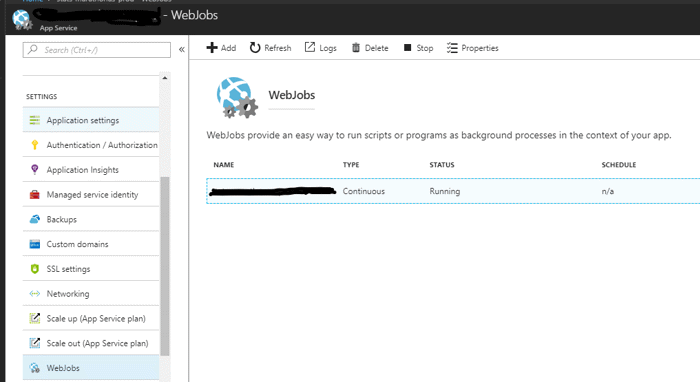
With the WebJob published, go into the Azure Portal and select your App Service. Under Settings, select WebJobs to see the WebJogs page. From this page, you can start and stop your WebJob and view its properties. There is not much else you can do here but click on the Logs button which will take you to the WebJobs page for monitoring.
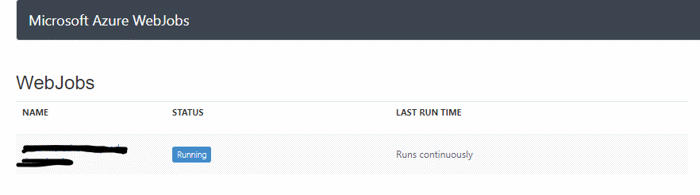
The main WebJobs page lists your WebJobs and their status. Click on the name of your WebJob to see its details.
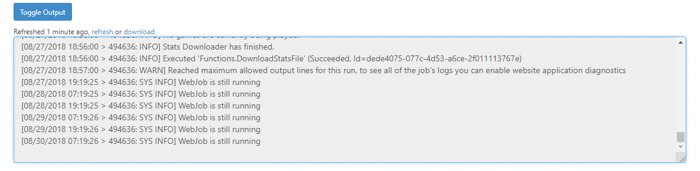
From here, you can click on the Toggle Output button and view the live stream of your WebJob log entries.
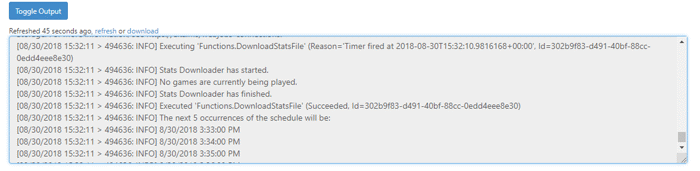
Note that after a certain limit, the live streaming will stop, and you’ll get the message “Reached maximum allowed output lines for this run, to see all of the job's logs you can enable website application diagnostics.” Your WebJob is still running but you won’t be able to see the log entries. If you can get away with it, you can stop then start your web app from the App Service to restart the live stream.
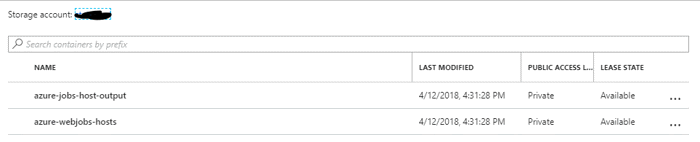
While the live stream is helpful in troubleshooting issues when you initially deploy the WebJob, it is not helpful for problems that come up after the WebJob has run for some time. Remember the 2 connection strings we set earlier? AzureWebJobsDashboard and AzureWebJobsStorage define where the WebJob stores log files. AzureWebJobsDashboard is primarily used by Azure WebJob SDK to store logs from the WebJobs Dashboard. AzureWebJobsStorage should point to a storage account where the logs are stored. The WebJob runtime creates 2 containers in this storage account with the names "azure-jobs-host-output" and "azure-webjobs-host" in the Blob service. You can view the containers by going to your Storage account and selecting Blobs under services.
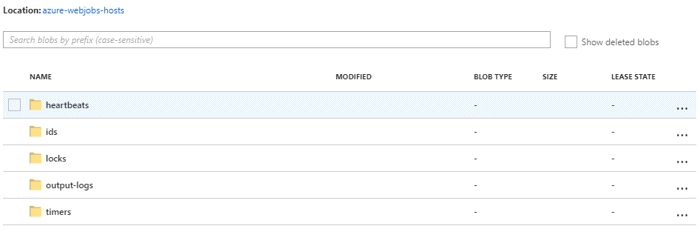
The azure-jobs-host-output container has the logs created by the WebJob runtime during initialization and termination of every execution. The azure-webjobs-hosts logs into several folders. Heartbeats contains logs for the heartbeat service, ids contains a log for the unique identifier for the service, and output-logs has the output of the explicit log for each time the service is run. The output-logs folder is where you will find the log output from your WebJob.
To get to the log files, you’ll need to install Azure Storage Explorer, which you can download for free. Once you have installed it and have it running, it will ask for your Azure credentials. With those in place, you can drill down to the output logs folder. From there, you can download a log file and see the WebJob log output.
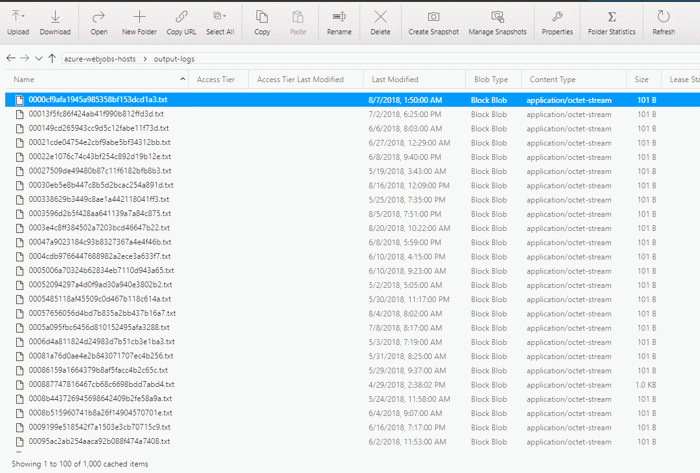
One of the issues I have with this setup is there is no easy way to get to a log file for a particular date and time when I need to troubleshoot the WebJob. One way to implement logging so that I can find a log file for a date and time is by enabling web application logging. Go to the App Service, select Diagnostics Log, then click on On under Application Logging (Blob). You’ll be prompted to select a Storage Container and the Retention Period.
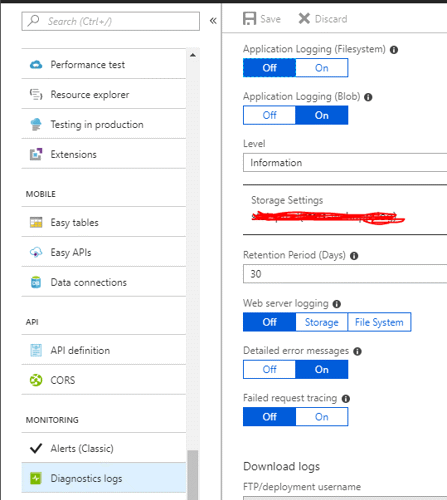
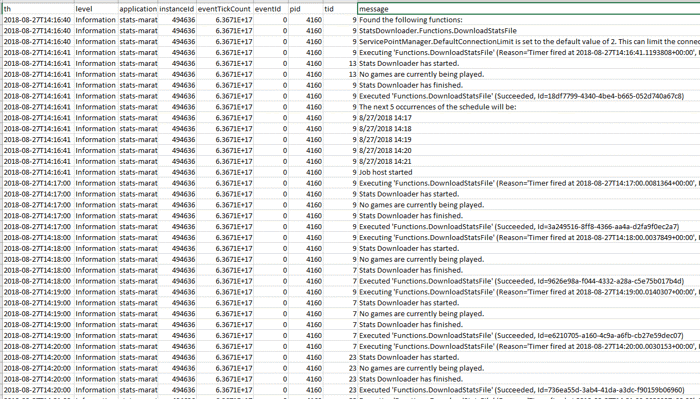
The log files that get created for the Application logging are in CSV format. Better than that, they are created in a folder structure of <year>/<month>/<day>/<hour> so you can find a log file for the exact date and time you want to view.
Conclusion
When you have a need for a cloud-based service, Azure presents you several choices and Azure WebJobs is one you should consider. If you have an existing App Service you are already paying for, then WebJobs makes a lot of sense. Since WebJobs are basically console applications, it is really easy to develop one, and once you configure logging, it is pretty easy to monitor them.

John HadzimaCore Contributor
John Hadzima is a Solutions Architect and Team Lead at Marathon Consulting. A graduate of Old Dominion University with a BSBA in Information Systems, he has been working as a developer in Hampton Roads for over 20 years with a focus on delivering solutions using the Microsoft Stack. When not coding, John enjoys surfing, skiing, biking, golfing, travel, and spending time with his two boys.